

How to Make A DIY Picture Ledge Shelf
This page may contain affiliate links. As an Amazon and Rewardstyle affiliate, we may earn a small commission for any purchases made through these links. Click here for the disclosure statement.

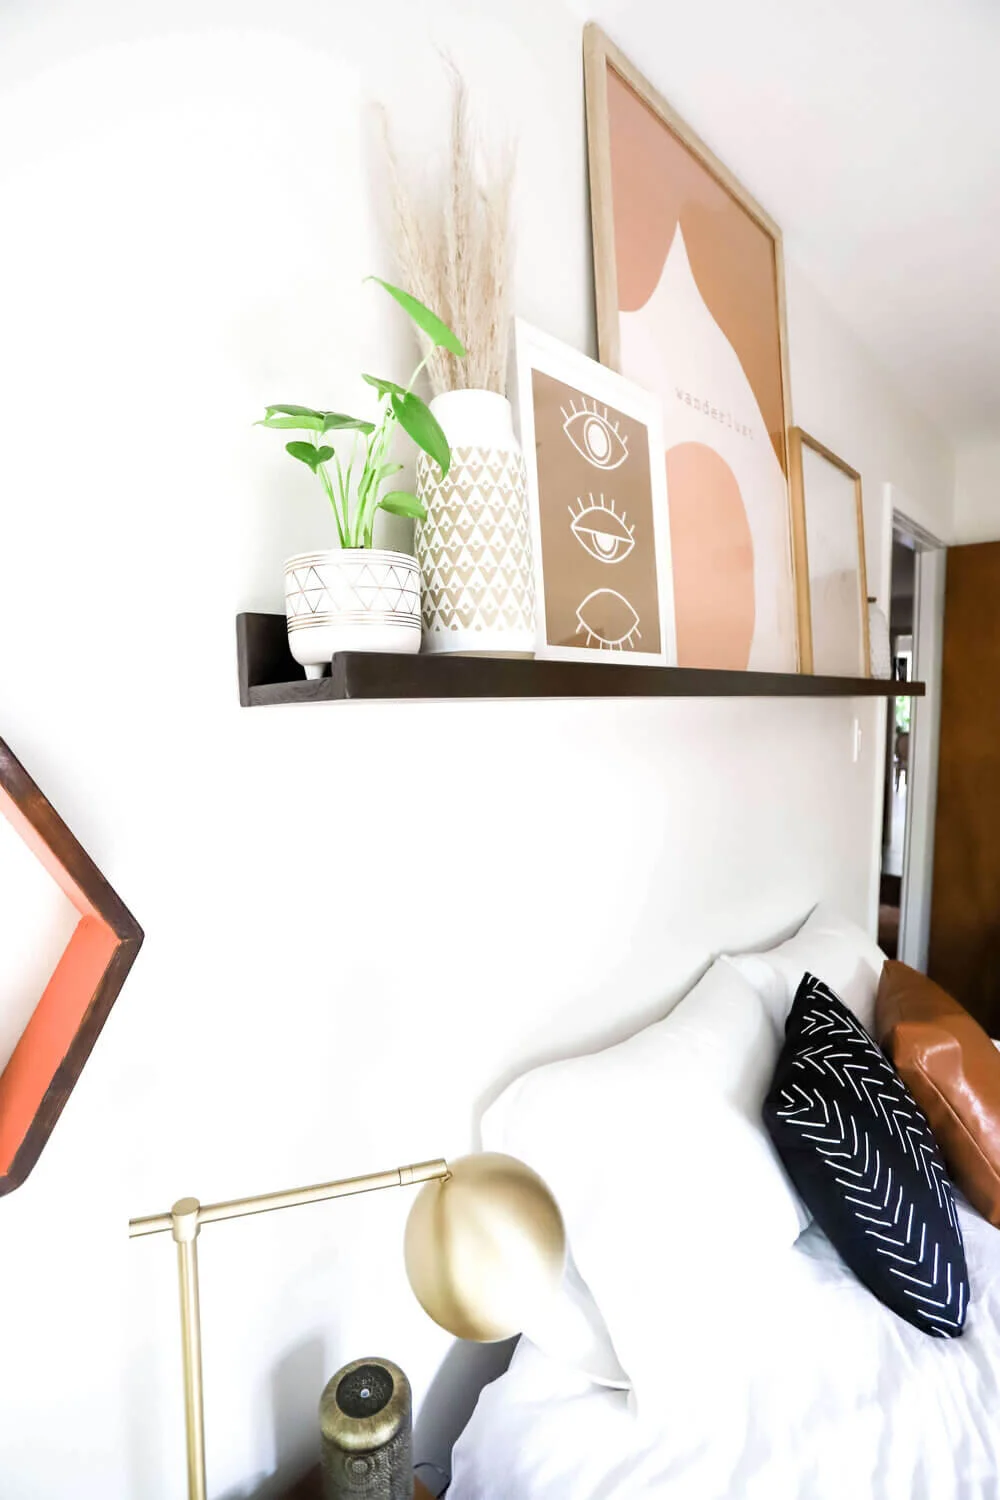
Love the look of a picture ledge shelf but don’t want to pay the high price tag? These simple wood DIY shelves are perfect for an easy weekend project. These floating shelves add interest to any room in your home, whether it is behind your sofa or above your bed. The ways to decorate your DIY picture rail are endless, but we’re partial to incorporating large prints and living plants!
We’ll show you how to build a 6-foot rustic picture ledge shelf yourself, with minimal tools!
DIY Picture Ledge Shelf

Supply List:
Note: It is very important to pick extremely straight, clean boards. Avoid warped wood or heavy knots.
(1) - 1”x4”x6’ Select Pine Board
(1) -1”x6”x6’ Select Pine Board
(1) - 1”x2”x6’ Select Pine Board
(1) - Qt. Your Stain of Choice - We used Kona Satin Oil-Based Interior Stain and Polyurethane
(1) -Tube of Gorilla Glue
(1) -2 in. Polyester/Bristle Blend Flat Stain and Polyurethane Brush
(4) -2 1/2” Wood Screws
Note: If you do not have a nail gun, you can use finishing nails + hammer.
Read More: DIY Project: Honeycomb Floating Shelves
How to Build the Picture Ledge Shelf:
Attach the 1”x 2” pine board to the 1”x 6” board by using Gorilla glue and lining boards up evenly. Insert a nail every 12”. The 1”x 2” will create the front “lip” of the picture frame ledge and the 1”x 6” board will create the bottom.
Attach the 1”x4” pine board to the opposite side of the 1”x 6” using Gorilla glue and inserting a nail every 12”. The 1”x4” pine board will create the back rail that attaches the floating shelf to the wall.
Wipe off any excess glue that may have been squeezed out of the wood seams.
Lightly sand the wood before applying stain.
Wipe on stain using light coats with brush and allow to dry per instructions.
Lightly sand the stained wood before applying the second coat. This will even out the finish from the previous coat and allow the next level of stain to absorb more richly.
To hang the shelf:
Locate studs in the wall by using a stud finder.
Mark with a pencil.
Using 2.5” wood screws, drill straight through the back board of your shelf, into the wall and into the stud. You should only need to use one screw per stud.
Decorating the shelf:
We used a variety of frame sizes and prints to add visual interest to the shelf. Digital prints can be an easy and affordable way to switch out your frames to change your room decor. Pampas grass with decorative vases can add height and adding in a houseplant is a simple way to bring the shelf alive.
Shelf details:

