

15 Minute Full Body Core Slider Workout
This page may contain affiliate links. As an Amazon and Rewardstyle affiliate, we may earn a small commission for any purchases made through these links. Click here for the disclosure statement.
Looking to switch up your usual gym routine with a challenging piece of equipment? Try using a pair of slider plates! In this simple 15-minute workout, we’re targeting all of the muscles of your body—including our favorite, core and glutes!—to build the best full body workout!
Why Should You Try Workout Sliders?
Sliders, also known as glider plates, sliding discs, or exercise sliders, are a great way to challenge your core and add a balance and stability test to any exercise. The slider workout benefits don’t end there! We love using sliders for slow tempo workouts and isometric holds to really create a burn in those deep, hard to reach muscles of the shoulders, chest, and core.
Since they are so small and portable, we highly recommend getting yourself a pair of inexpensive workout sliders to keep in your travel bag for on-the-go workouts. Our favorite glider plates have a soft and a hard surface, which makes them ideal for use on various surfaces, such as carpet, tile, or hardwood.
We think that they will quickly become your favorite piece of workout equipment.
What is the Goal of this Workout?
Switching it up is key to breaking out of the workout routine boredom. By using the sliders to challenge your stability, we’re able to more easily target and engage all of the muscles of the body for a quick and effective workout. This is also a great way to build strength and muscular endurance by just using your bodyweight.
Note: If you don’t have a pair of exercise sliders, you can easily DIY these gliding discs! Simply use a pair of paper plates —they will slide easily on carpet or tile.
This workout is easily modified, which makes it perfect at-home full body slider workout for beginners or advanced athletes.
See our full workout series here.
Watch the video:
15 Minute Full Body Slider Workout
Suggested:
5-10 Minute Warmup (such as a walk)
Optional:
Hold the position at the lowest point of your range of motion — this will challenge your muscles to work harder as you stay in an isometric hold.
Want an added challenge?
Add in a pair of dumbbells or even a mini band in the plank exercises to add extra resistance.
Need a modification?
If the workout becomes too challenging, easily drop down to your knees to take pressure off your shoulders and wrists. Also, you could easily do this entire workout without the exercise plates.
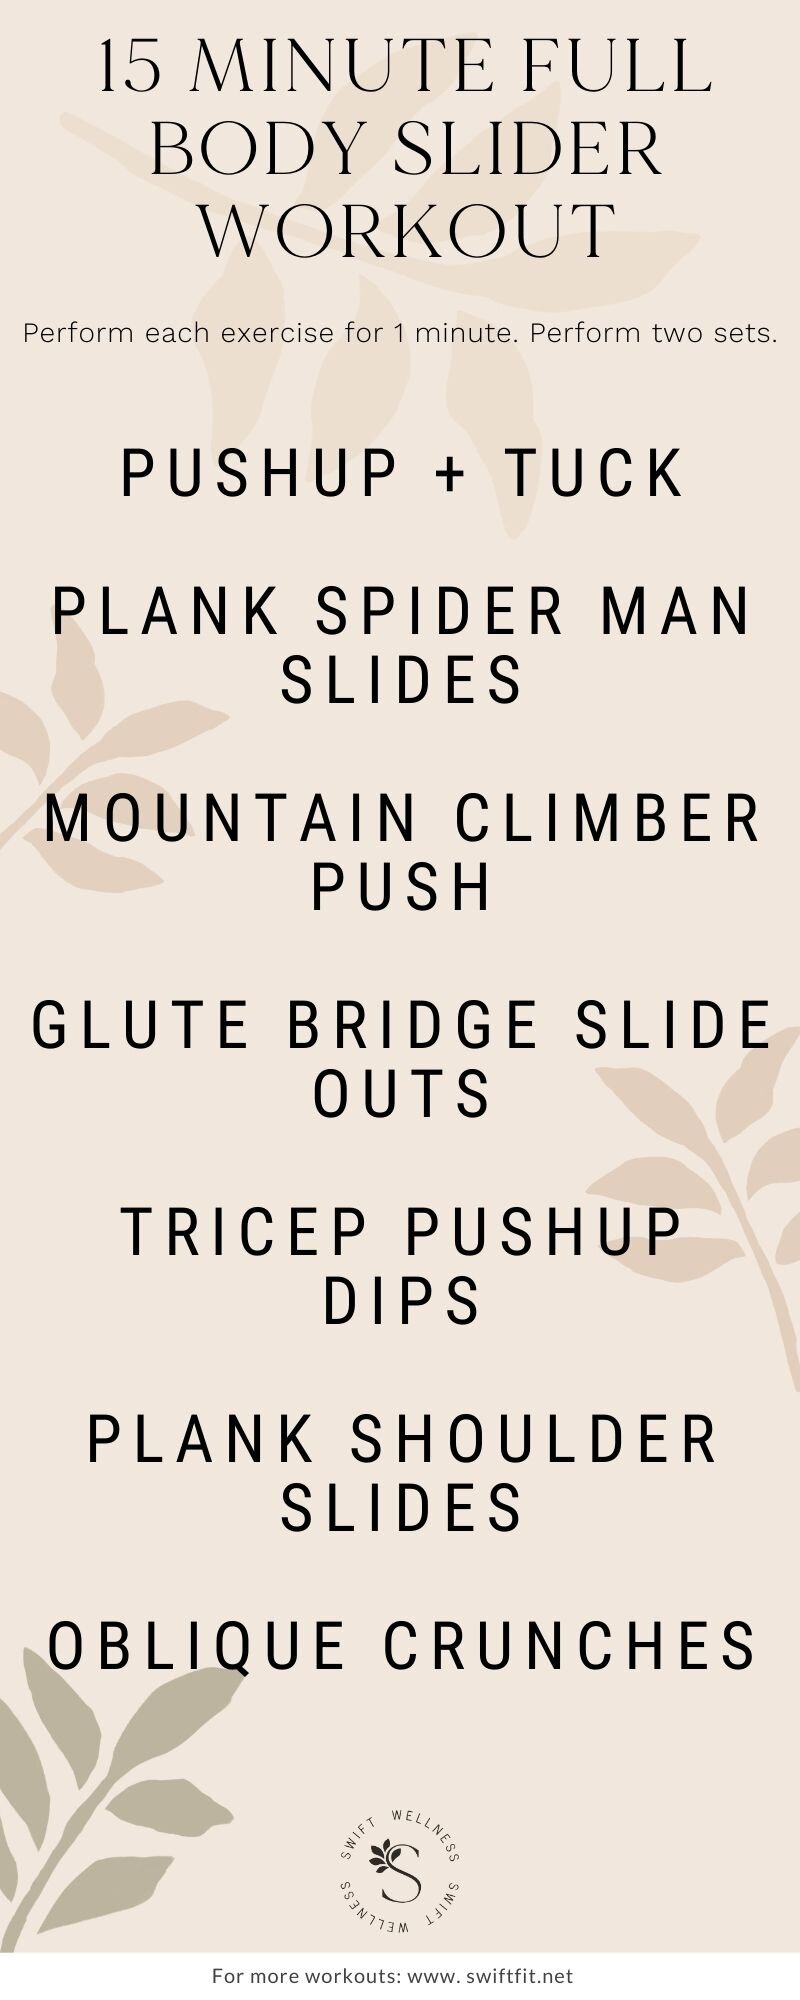
Full Body Exercises List:
One minute per exercise. Do two sets.
Pushup + Tuck
How-to: Start in a pushup position with the core sliders underneath your toes. Press your chest into the mat and press back up. Bring both knees into chest and slide back out into a plank.
Form tip: Keep the core engaged throughout the entire movement and don’t let the back round during the knee pull ins.
Modification: Drop to your knees for the pushup if you are not able to do a full pushup yet. Also, if you have difficulty bringing both knees into the chest at the same time, alternate left and right before each pushup.
Plank Superman Slides
How-to: Start in a push up position. Bring the same knee to the same elbow as you press down into a low pushup. Press back up to a high hand plank as you return the leg to the plank position. Alternate with each pushup.
Form tip: Keep the weight directly over the wrist and the body in one long line. Do not let the back round.
Modification: Break up the two parts of the movement by bringing the knee to the elbow and then performing the pushup or optionally, drop to your knees.
Mountain Climber Pushups
How-to: Start in a pushup position and alternate bringing the knees into the chest.
Form tip: Keep the abs engaged to prevent unnecessary rocking in the hips. Stacking the weight above your hands ensures that you won’t allow the hips to rise and will focus the movement on your lower abs.
Challenge: Speed up the movement for a high intensity interval training cardio burst.
Glute Bridge Slide Outs
How-to: On your back, press your hips up and squeeze your glutes. With the glider plates underneath your heels, alternate extending each leg, while not dropping the hips.
Form tip: When you extend each leg long, make sure to keep the heel pressing into the sliding disc. Squeeze the glutes and don’t let the hips drop.
Challenge: Extend both legs at the same time. (This is very difficult!)
Tricep Pushups
How-to: Start by sitting on your butt, arms behind you in line with your hips, fingertips turned towards your core, knees bent and feet flat into the mat. Squeeze the glutes and lift the hips from the mat. Shift your weight backward so that it is directly over the wrists. Bend the elbows and press through the hands for a tricep exercise.
Form tip: Keeping the weight directly over your hands ensures that the tricep is being properly activated. Keep the elbows pointed away from your body and keep the placement narrow. If your hands are too far from the center of your body it will place stress on your shoulders and not work the tricep muscles.
Modification: To relieve pressure on the hands or sensitive wrists, set your glutes on the ground and press backwards into the hands.
Plank Shoulder Slides
How-to: Start in a pushup position with the slider plates underneath your hands. Slide one arm out in front of you as far as possible. Bring the hand back to center and alternate arms.
Form tip: Avoid letting the hips rock by engaging the core and squeezing the abs and glutes. Only extend the arm as far forward as you’re able pull back in.
Modification: Drop to your knees to extend your range of motion.
Oblique Crunch
How-to: Placing the hands behind the head, elbows wide, stack the knees directly over the hips. Extend one leg long and crunch on the opposite side, bringing elbow and knee to touch.
Form tip: To get the most out of this oblique ab exercise, keep the crunch in one line with the hip, without leaning forward or back.
Subscribe to our Youtube Channel for updates on the latest videos!