

4 Best Beginner Gym Equipment Must-Haves For Home Workouts
This page may contain affiliate links. As an Amazon and Rewardstyle affiliate, we may earn a small commission for any purchases made through these links. Click here for the disclosure statement.
Have you been wanting to create an easy-to-use home gym, but don’t know where to start? Are you afraid of having to buy bulky, expensive equipment? Are you living in an apartment or small space? Do you not have a garage?
All of these questions are common when it comes to deciding exactly what you should purchase to create a complete, convenient home gym. Even if you have a spare room in your home or available space in your garage, you want to make sure that you create a gym full of equipment that you actually use.
Even more intimidating? The vast array of different home gym equipment. If you are a beginner and just starting to work out, it’s likely that you have been overwhelmed by the amount of strength training equipment both online and in sporting goods stores. You might have even closed the browser in frustration!
We’re here to help you create a functional, multi-purpose home gym with as few pieces of equipment as possible. Even more important, we love versatile pieces of fitness equipment that allow you to conveniently store them in even the tiniest apartment, or take them on your next vacation or work trip! No more letting fancy gym equipment gather dust and take up space in your closet.
These beginner-friendly pieces of workout equipment can get your heart rate up, muscles firing, and the sweat dripping! Plus, we’re here to show you how to use this home gym equipment and create mini workouts for you that you can do anywhere to achieve your fitness goals!
The 4 Best Home Gym Equipment Items to Have
Equipment Used In This Article

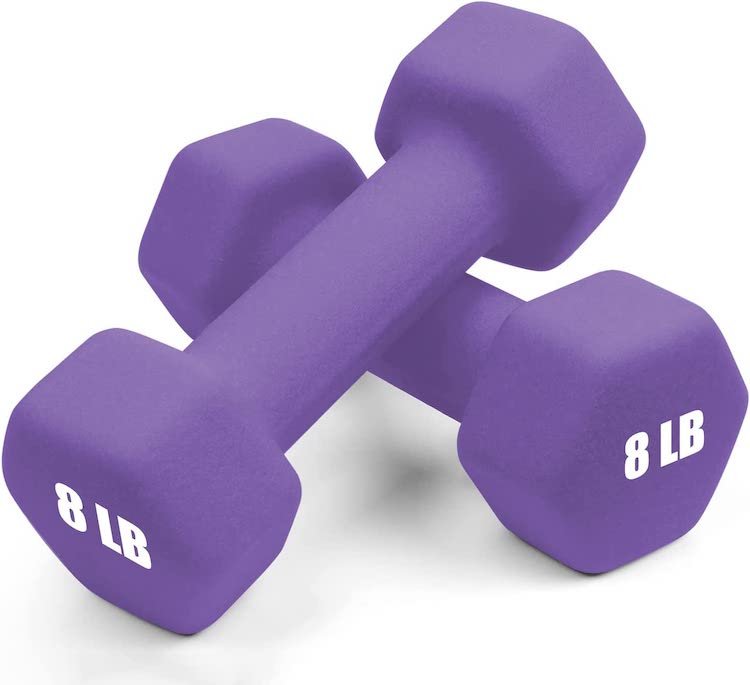
A Set of Free Weights
Of course, no home gym is complete without a set of free weights. A standard dumbbell set can come in weights anywhere from one pound up to a hefty 40 pounds! Now, while we don’t recommend storing 80 pounds of weight in a tiny closet, a light set of dumbbells, such as 2-5 pounds can provide enough resistance for a wide variety of exercises.
Amazon
How to Use Free Weights
Sure, we all know how to use a set of dumbbells. Bicep curls, shoulder raises, even the occasional chest press. But when it comes to using the dumbbells for your lower body or core, do you know where to begin?
For Your Upper Body
An upper body workout is probably what you think of when you see a set of dumbbells. But, let’s think outside the box and give you a unique (but still challenging!) upper body workout!
TRY THIS:
10 Plank Row + Tricep Kickback (each side)
20 Forward Bicep Curls
30 Alternating Lat Pulldowns
40 Arm Circles
Repeat 3 Times
Exercise Instructions
Plank Row + Tricep Kickback: Start in a pushup position. Keeping palm facing towards your body, pull one arm up, with elbow leading, bringing thumb to armpit. At the top of the position, fully extend the arm, with pinkies facing up.
Forward Bicep Curls: Standing tall, core engaged, extend arms out in front of you, parallel to the ground, palms facing each other. Bend your elbows and, without dropping your arms, curl the weights to your shoulders. Extend.
Alternating Lat Pulldowns: In the same position as the previous exercise, extend your arms over your head, with palms facing away. With elbows wide, pull the weights down and back, focusing on squeezing the shoulder blades as you do so. Fully extend the arms.
Arm Circles: In the same position, hold your arms out to the side, parallel with the ground, palms facing down. In clockwise movements, rotate your arms in small circles. After 20 circles, stop and reverse the circle to complete the exercise.
For Your Lower Body
The lower body is where the true fun of free weights come in! When we say lower body, do you say “Squats!?” No, let’s take those endless squats out of the equation by doing a lower body dumbbell workout without a single one! Plus, we guarantee that this one will have your glutes (read: booty) burning!
TRY THIS:
(same side before switching)
20 Donkey Kicks
20 Hamstring Curls
20 Fire Hydrants
20 Glute Bridges
Switch legs; Repeat
Exercise Instructions
Donkey Kicks: Start in a quadruped position, with shoulders stacked over hands and hips over knees. On one leg, flex the foot and lift the leg, keeping the 90 degree angle at the knee. Lift until the leg is parallel with the ground and the bottom of the foot faces the ceiling. Lower down.
Hamstring Curls: In the same position as the previous exercise, extend one leg long until it is parallel with the ground. Flex the foot and, without dropping the leg, bring the heel of the lifted leg to reach towards the glutes. Extend the leg fully without dropping the leg.
Fire Hydrants: In the same position as the previous exercise, open your hip on one leg to the side, keeping the knees in one line. Avoid rocking into the kneeling leg as you lift. Lower down and repeat.
Glute Bridges: On your back, place your hands by your sides, palms facing down, feet into the ground, knees to the ceiling. Squeezing through the glutes, press the hips up to the ceiling and slowly lower down.
For Your Core
Let’s fire up those abdominals! Yes, you can actually work your midsection with a pair of dumbbells. This added bit of resistance helps to add a challenge to bodyweight ab exercises. And, if you think this workout is just full of endless crunches, think again!
TRY THIS:
10 Weighted Leg Lowers
15 Scissor Kick Reaches (each side)
20 Oblique Taps
Repeat once
Finisher: Finish with a round of Hundreds
Exercise Instructions
Weighted Leg Lowers: Place the weight in between your calves or, optionally, held between your feet. Lie on your back, palms pressed into the mat, legs at a 45 degree angle to the body. Slowly lower down to the lowest point that you can keep your back on the mat, slowly lift.
Scissor Kick Reaches: In the same position as the previous exercise, extend one leg long to the ground, while the other leg reaches towards the sky. Take the dumbbell and curl through the head, neck, and shoulders to reach it past the lifted leg, keeping the leg as straight as possible. Switch legs.
Oblique Taps: Lie on your back, with feet on the ground and knees pointed to the ceiling, arms extended over your chest. Roll the head, neck, and shoulders off the mat, reaching to one side of your body. With arms outstretched, hands in fists, tap the fists together in small movements without dropping the curl. Perform all on the same side and then switch.
Hundreds: In the starting position as the previous exercise, roll the head, neck and shoulders from the mat, arms reaching towards heels, palms facing the mat. Slowly pulse your arms, counting to 100, without dropping the curl. Make sure to breathe!

A Set of Resistance Bands
We’ve all seen those colorful, stretchy bands with handles hanging on the walls of the gym. But did you know that these resistance bands can be one of the most useful and versatile pieces of equipment in the entire gym? In most resistance band sets, there are a variety of strengths so that you can instantly add weight and difficulty to any movement. Want to make it more challenging? Shorten the length and intensify the tension. Attach them to railings, shut them in doors, stand on them, twist them, the possibilities are truly endless. And when you’re done? Just toss them into a bag, shut them in a drawer, hang them in a closet, there is no wrong answer! Even better - these bands can quickly roll up and make the perfect companion for a travel workout anywhere.

Amazon
12 Piece Resistance Band Set
URBNFit
How to Use Resistance Bands
Ready to get started? Before you think that these stretchy rubber tubes aren’t “strong enough” to get a good workout in, try these exercises!
For your Upper Body
Resistance bands can be, in most cases, used in lieu of dumbbells. But, by standing on the band, you can increase the tension as you work through the entire range of motion.
TRY THIS:
20 Isometric Bicep Curls (each side)
20 Alternating Curl and Press
20 Alternating Chest Press
20 Overhead Tricep Extensions
Repeat 2 times
Exercise Instructions
Isometric Bicep Curls: Stand on the band with as much resistance as you want. Holding one bicep at 90 degrees, elbow pinned to the side, curl the opposite arm, fully extending at the bottom. Make sure to keep tension in the arm that is not moving. Perform all reps on the same side before switching.
Alternating Curl and Press: In the same position, place both hands at your sides, a band in each hand. Curl one arm up to the shoulder for the bicep curl, and then press up overhead into a shoulder press, rotating the palm away from your body as you lift overhead. Alternate arms.
Alternating Chest Press: Standing, wrap the resistance band around your back, with the ends in each hand, arms at 90 degrees at your side, arms parallel with the mat, palms down. Without dropping the opposite arm, press out in front of you, to fully extend the arm. Return the arm to the starting position and alternate to the other side.
Overhead Tricep Extensions: Stand on the band and extend the arms overhead, keeping the elbows close to the ears, both hands clasp together. Squeezing your core, bend your arms, bringing your hands to come behind your head, elbows pointed upwards.
For Your Lower Body
Resistance bands can also be a powerful tool for your legs as well!
TRY THIS:
20 Resistance Squats
20 Banded Good Mornings
20 Bear Plank Leg Lifts (each side)
Repeat one time
Exercise Instructions
Resistance Squats: Stand on the band, keeping your feet hips distance apart. (If you need additional resistance, wrap the band around your hands to tighten.) Curl the bands to your shoulders, palms facing in, and perform a squat like you normally would.
Banded Good Mornings: Place the ends of the band underneath your feet. Step into the resistance band, putting the loop around your shoulders, but avoiding your neck! Hinge at the hip, sending the glutes back, slight bend in the knees, until your back is parallel with the ground. Press into the band as you stand.
Bear Plank Leg Lifts: Start in a quadruped position, with shoulders over wrists, hips over knees. Press into the hands to lift the knees from the mat 1-2 inches. Without dropping the opposite knee, extend one leg long, foot pointed. Slowly lift and lower the leg. Perform all on the same side, without dropping the knee, before switching.
For Your Core
Don’t neglect the core with these resistance bands! Keeping tension in your arms, shoulders and abdominals will work your entire core in compound movements!
TRY THIS:
20 Russian Twists
20 Press Aways
20 Oblique Pulls
Repeat two times
Exercise Instructions
Russian Twists: In a seated position, feet into the mat, core engaged, resistance band looped around your back, ends of the band in each hand. Keep arms extended in front of you and lean back, keeping the chest tall. Rotate to either side of the knees, keeping arms long.
Press Aways: Lie on your back, legs at 90 degrees, knees stacked over hips. With the band looped around the bottom of your feet, ends in either hand, press out and away from your body to 45 degrees. Slowly return to the starting position.
Oblique Pulls: Start in a kneeling position, with one knee into the mat and the opposite leg stretched outward to the side, knees in one line. Keep the band underneath the knee, as well as the outstretched leg, the ends of the band in either hand. Bring the hands to the shoulders, keeping tension in the resistance band. Without tipping forward or back, crunch to the side of the outstretched leg. Perform all reps on the same side before switching.

A Mini Band
If you follow along on our YouTube channel, you know that the mini band is easily one of our favorite items on the list! This small loop band is so much stronger than it looks! By taking this tiny resistance band around your quads, ankles, or wrists, you can easily create a full body workout in no time flat! Plus, this super small band can roll up and fit into any bag—so take it to the gym, to the park, or even to the hotel room.

Amazon
How to use the mini band
The best part of the mini band is its versatility. This little rubber band has no hooks, handles, or weight. It’s purely a resistance monster! We’re sure that any of these workouts will make a frequent appearance in your workout routine.
For Your Lower Body
The mini band is the perfect compliment to any lower body routine. With one simple piece of equipment, you can wrap it around your quads for a strong squat challenge, or around your ankles to work all of the muscles of the glutes, especially that oft forgotten gluteus medius.
TRY THIS:
(Place mini band around ankles)
20 Walking Side Step (each way)
20 Zig Zag Step (10 forward, 10 reverse)
20 Standing Leg Raise (each side)
Repeat one time
Exercise Instructions
Lateral Side Step: Start with the mini band around your ankles. Hinge your hips backward, slight bend in your knees. Step out to the side, bringing your opposite foot to meet it, always returning to feet underneath hips.
Monster Walk: Also known as a “zig zag” step, place the mini band around your ankles and take one step forward and out to the side. Bring the opposite foot to the arch of the forward leg, tapping the toe before stepping out and forward on the opposite leg. Continue this pattern forward and then reverse, completing the same movements as you go backward.
Standing Side Leg Raise: Using a chair or wall for support, squeeze your glutes and stand tall. With the mini band around your ankles, lift your leg to the side, making sure to keep the knees in one line, without arching your back or leaning into the standing leg.
OR:
(Place mini band around thighs)
20 Squats
20 Reverse Lunges (each side)
20 Side Lying Leg Raise (each side)
Repeat two times
Exercise Instructions
Squats: Place the mini band above your knees, feet just outside your hips. Hinge the hips back, keeping your chest tall, and knees pressing out against the band. Slowly lower to a parallel position and then stand up, making sure to squeeze the glutes at the top.
Reverse Lunges: With the mini band above the knees, stand tall and take a step backward, bringing both knees to 90 degrees. Find the bottom of the lunge and step the foot back to standing. Make sure to not let the knees push forward over the ankle.
Lying Side Leg Raise: On your side, hips stacked, and and underneath head to support, place the mini band around your ankles or above your knees. Keeping feet flexed, lift the leg up, always bringing it back to meet the bottom knee. Perform all reps on the same side before switching.
For Your Upper Body
The mini band might have a reputation as a lower body only piece of workout equipment. However, you can get creative add some seriously difficult moves with the mini band.
TRY THIS:
20 Chest Press
20 Kneeling Bicep Curl (each side)
20 Alternating Bent Over Row (each side)
Exercise Instructions
Chest Press: Extend the arms in front of you, parallel with the ground, mini band in each hand. Without dropping the arms, pull the band apart and press the elbows back. Bring the arms back to the starting position.
Kneeling Bicep Curl: Start in a kneeling position, one foot in front of you and the other behind. Loop the mini band just above the knee of the reverse leg and hold on to it with the hand on the same side. With the opposite elbow, place it on the forward knee. Slowly curl the arm up to the chest and lower down. Repeat all on the same side and then switch.
Alternating Bent Over Row: Hinge at the hip, slight bend in the knee, extend your arms out in front of your towards the ground, palms down. Keeping one arm extended, pull against the band, rotating the arm as you bring it back to your chest, palm facing the ceiling. Bring the arm back to the starting position and switch to the opposite side.
For Your Core
The core might just be one of our favorite ways to use the mini band! It’s sneaky, and that resistance burn can be felt all the way into the deep abdominals.
TRY THIS:
15 Bicycle Holds
15 Pulsing Leg Lowers
15 Sit Ups with Arm Raise
15 Wood Choppers
Repeat one time
Exercise Instructions
Bicycle Holds: Lie on your back, with your knees stacked over your hips, feet flexed. Place the mini band around your feet and hands behind your head, elbows wide. Curl up with your head and shoulders, bringing the opposite elbow and knee to touch and hold for two seconds. Return to the mat and sit up again, bringing the opposite knee and elbow together.
Pulsing Leg Lowers: Place the band around your ankles and extend your legs above you, creating an L-shape. Without losing the tension in the band, slowly lower down the legs to the lowest point that you can, without letting your back come up from the mat. Slowly lift back to the starting position.
Sit Ups with Arm Raise: Lie on the mat, arms and legs long. Loop the mini band around your hands. Without losing tension in the band, sit up into an L-shape, with arms overhead. Slowly lower the arms to become parallel with the ground, and then return to overhead extension. Then, slowly lower back to the mat.
Wood Choppers: In a seated position, with feet into the mat and knees pointed upwards, wrap the mini band around your hands and maintain tension. Slowly lean back, with arms outstretched diagonally in front of your body. Chop down to the opposite side, bringing the hands to the opposite hip. Perform all reps on the same side before switching.

A Mini Stability Ball
Last but not least, we come to this mini stability ball. You might have seen these in a yoga, barre, or pilates class, and we love them! We also know that you might not have room in your home or garage for a large stability ball, so this mini size allows you to get a killer workout in and easily store it away when you’re done.

Amazon
Mini Pilates Ball
URBNFit
How to Use a Mini Stability Ball
One of the easiest ways to use this ball is to add a small amount of support anywhere that you might need it — your lower back, underneath your hips, or even under your side. However, it does also allow you to use it as a resistance ball and doubles as a balance challenge, too! As with all of these pieces of equipment, the pilates ball (also called a barre ball) is incredibly functional! We just recommend having a yoga mat or exercise mat handy for any floor exercises.
For Your Lower Body
Who needs heavy weights or bulky machine equipment to get in a leg workout when you can use this small inflatable ball as a challenge?
TRY THIS:
30 Leg Squeezes
20 Donkey Kick Pulses (each side)
10 Single Leg Balance Glute Bridges (each side)
Repeat one time
Exercise Instructions
Leg Squeezes: In a quadruped position, with hips stacked over knees, place the mini stability ball behind one knee. Keeping the foot flexed, lift the leg until it is parallel with the mat. Without dropping the leg, squeeze the heel into the glutes.
Donkey Kick Pulses: In the same position as the previous exercise, keep the stability ball behind the knee and bring the leg parallel with the mat. Keeping the foot flexed, press the bottom of the foot towards the ceiling, without losing the squeeze or dropping the leg.
Single Leg Balance Glute Bridges: Lie on your back and place the pilates ball underneath one foot, with the opposite foot on the ground. Find your balance on the ball and lift the opposite leg towards the ceiling. With palms into the mat, press up with the hips into a glute bridge, focusing on not losing your balance on the ball. Slowly lower down.
For Your Upper Body
Keeping tension on the ball by squeezing it between your hands activates all of the muscles of your upper body!
TRY THIS:
10 Balance Knee Pushups (each side)
15 Chest Presses
10 Tricep Squeezes & Reaches
Exercise Instructions
Balance Knee Pushups: Start in a pushup position, with hands under shoulders and body in one line. Drop to your knees and place the mini stability ball underneath one hand. Find your balance, and slowly lower the chest to the mat and then press back up to the starting position. Challenge: Do pushups without your knees.
Chest Presses: Standing, or kneeling, hold the ball in front of your chest, with elbows wide. Maintain a squeeze on the ball and slowly extend the arms. Bring the ball back to your chest.
Tricep Squeezes & Reaches: Either standing or kneeling, hold the ball behind you, with palms squeezing the ball. Lift your arms up, keeping the arms long. Slowly bend and extend the arms, adding a squeeze in on the ball at the extension.
For Your Core
This mini stability ball was made for the core, with so many move to try!
TRY THIS:
10 Balance Leg Lowers
10 Sit Up & Reach
20 Crazy-8 Scissor Kicks
20 C-Curve Pulses
Repeat two times
Exercise Instructions
Balance Leg Lowers: On your back, place the ball underneath your hips and extend your legs, creating an L-sit. Slowly lower your legs down, finding your lowest point that you can maintain control and bring the legs back to the starting position.
Sit Up & Reach: Lie on your back, knees at 90 degrees, with feet flexed. Place the ball between your hands, arms outstretched overhead. Without moving your legs, sit up and place the ball on top of your shins. Slowly lower back down. Sit up again, reaching towards the ball, and bring it back to the starting position.
Crazy-8 Scissor Kicks: On your back, extend your legs long, one hovering just over the mat, and the other extended at 45 degrees. Roll the head, neck and shoulders from the mat, reaching the ball behind the lifted leg. As you switch between legs, alternate bringing the mini stability ball forward and around each leg, creating an “8” shape.
C-Curve Pulses: Start in a seated position, with feet into the mat. Place the pilates ball behind your back, rounding your back into a C-curve. Slowly, pulse back into the ball.
Watch the video: