

How To Make Your Own Candles At Home
This page may contain affiliate links. We may earn a small commission for any purchases made through these links. Click here for the disclosure statement.
After a long week of grueling to-do lists, the best way to unwind is with your current read and an inviting candle. If you’re tired of the same store-bought candles infused with patchouli, why not try making your own candles? Creating your own is easier than you think, with many benefits when compared to store-bought.
Why You Should Make Your Own Candles
Not only is making homemade candles a great activity to do at your next craft session or date night, but you can also have total control over every ingredient that goes into the mold.
It’s More Cost Effective
You shouldn’t have to sacrifice your budget to make your home smell nice. Similar to everything else on your shopping list, the prices for store-bought candles are rising. While you may find affordable smaller-sized candles, larger sizes can often run upwards of $30. If you’re regularly burning candles in your home, this expense can quickly add up.
Instead of spending hard-earned money on store-bought candles, you could put those same funds towards supplies to make your own. Especially if you plan to burn candles regularly, this can be far more cost-effective as you can typically create multiple candles from just one batch.
You Can Choose Eco-Friendly Options
Many store-bought candles are created from paraffin wax that’s made from petroleum–a byproduct of fossil fuels. While many companies use this type of wax to help cut costs, it requires intense drilling and extraction methods to harvest. This, as history has revealed through multiple major ocean oil spills, can have devastating effects on the environment.
However, by making your own candles, you can choose eco-friendly materials that will allow you to enjoy a great-smelling home guilt free.
Tip: Some common, environmentally-conscious alternatives to paraffin wax include soy wax, coconut wax, or beeswax!
They’re Completely Customizable
Have you ever reached for a candle that’s housed in a beautiful glass jar but has the most peculiar scent your nose has experienced? Or maybe you love the scent but dislike the color of the container? From the fragrance to the vessel, the crisp autumn sky's the limit when it comes to the personalization you can put into your candles. Want to use a cute thrifted jar infused with a pumpkin smell because you’re a pumpkin fiend? Nobody’s stopping you when you make your own!
It’s A Fun Hobby
If you’re tired of diamond painting or your hands need a break from crocheting, try picking up candle making as a new hobby. The candle making process is a calming activity that allows you to practice creativity, which can reduce stress. And, homemade candles make a thoughtful gift for your loved ones for the holiday season, birthdays, or just because. (Plus, it saves you the headache of shopping.)
Materials You Need For Candle Making
Price Reference (average price):
$ | Under $30
$$ | Between $30-$60
$$$ | More than $60
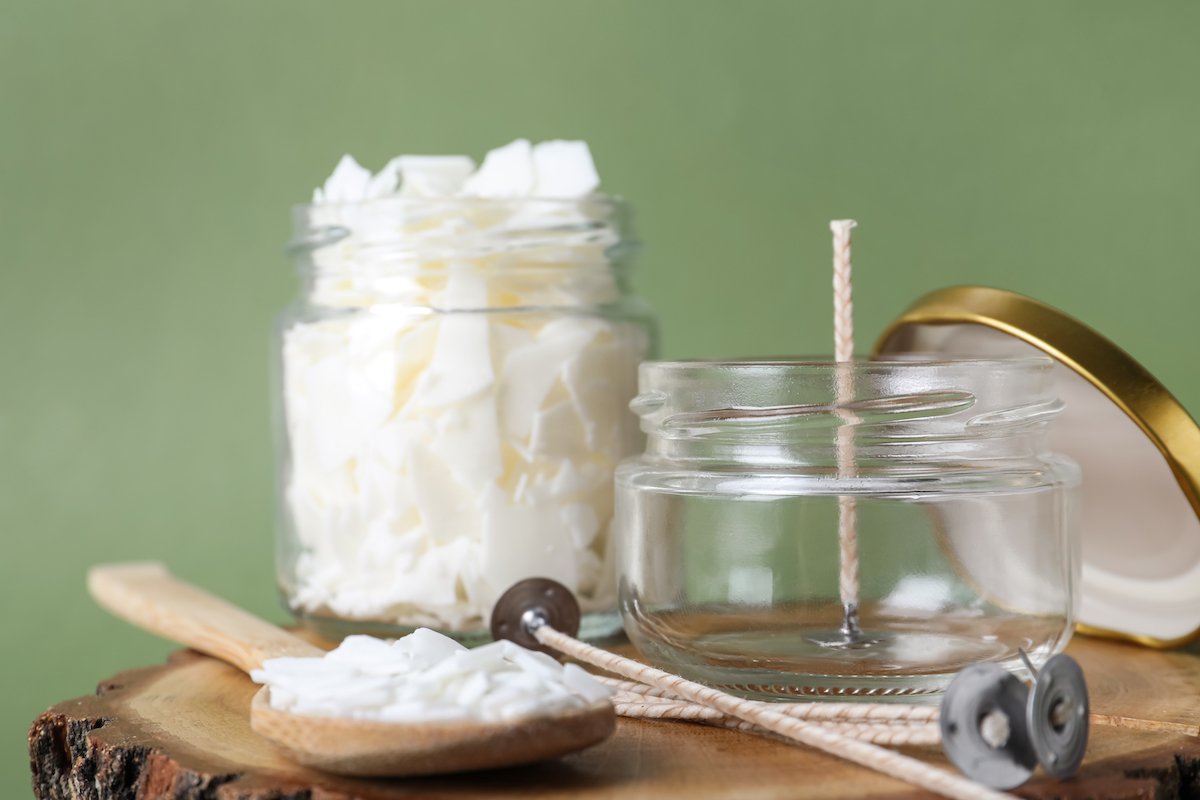
Wax
From soy wax to beeswax to blends, there are so many options to choose from when selecting a wax.

Image: Michaels
Soy Wax Flakes
Make Market®
Price: $
Soy wax is a common eco-friendly alternative to paraffin derived from soybeans. An easy to use option, soy wax holds and disperses fragrance oils effectively, so you can enjoy the aroma evently throughout the entire room. Candles made with soy wax also offer a slower and soot-free burn that allows you to enjoy your candles for an extended period of time before you have to replace them.
Why We Love It: Many bulk soy wax options come in an easily meltable flake form so you don’t have to worry about chopping through large bricks of wax.

Image: Amazon
Organic White Beeswax Pellets
Sky Organics
Price: $
Beeswax candles have been around for centuries, and for good reason, too. Produced by bees during their honey-making process, beeswax is a non-toxic and sustainable option for creating natural candles at home. Not only do beeswax candles have little soot and a longer burn time, but they also have a subtle honey scent that adds a pleasant aroma to your space without the need for additional fragrance oils.
Why We Love It: Beeswax has a natural golden color that adds a warm and inviting glow to your candles.
Wicks
While there are many different types of wicks that you can choose from for your candles, this is one of the most crucial choices you’ll make during the candle making process as your wick will affect how your candle burns.

Image: Amazon
Cotton Candle Wick Kit
Candmak
Price: $
Cotton wicks are one of the most popular options because of their affordability and versatility. These wicks provide a clean and even burn with little to no soot that helps maintain a cleaner, healthier indoor environment, so that you and your family (including your furry companions) are less likely to experience irritation while your candle is burning.
Why We Love It: Instead of grabbing a chopstick to help keep your wick anchored while it’s drying, opt for this wick kit that includes adhesives and wick holders.

Image: Amazon
Hemp Candle Wicks
Price: $
A sustainable option for your candles, hemp has a natural ability to absorb liquid by helping the wick draw up the melted wax and feed the flame. However, hemp burns more quickly than other materials if the wick is not treated first with beeswax, as the added wax helps to create a slow, consistent burn.
Why We Love It: This set includes wick-centering tools, so you can easily help your wick stay in place while the wax dries.
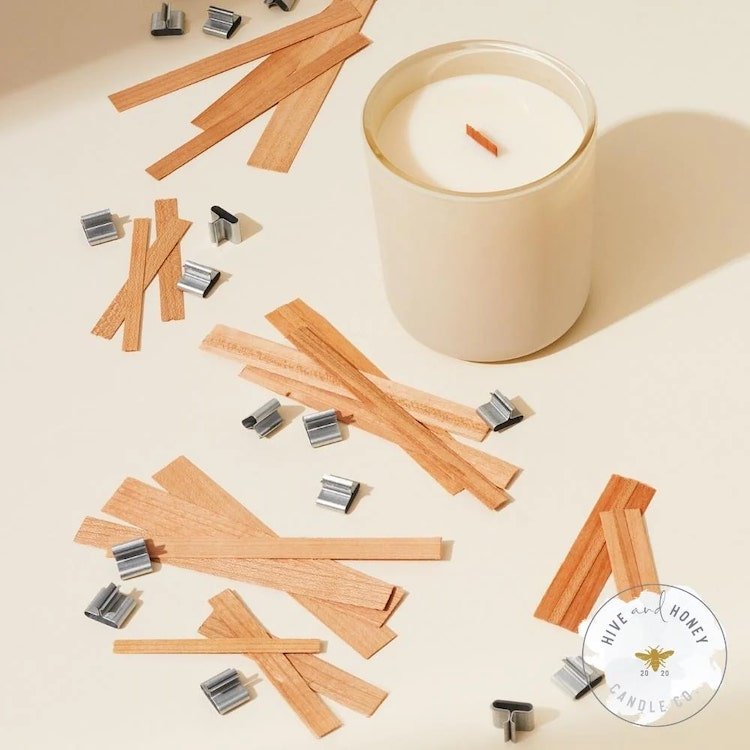
Image: Hive & Honey
Wooden Booster Wicks
Hive & Honey
Price: $
If you love listening to the soothing sound of a crackling fire, a wooden wick is the one for you. Wooden wicks not only give your candles a unique appearance, but their gentle popping sounds also create a cozy and inviting ambiance when burned. These wicks also often have a longer burn time than both cotton or hemp so you can enjoy a sensory delight for hours to come.
Why We Love It: These eco-friendly essentials include metal clips to help keep your wick in place.

Image: Amazon
Fragrance Oil Floral Set
P&J
Price: $
There’s nothing better than burning a candle and enjoying the entrancing scent as it wafts throughout your space. When making your own candles at home, you have the creative freedom to choose your own unique combination of fragrances. From lavender and vanilla to rose and geranium, the scent opportunities are endless. Natural essential oils and fragrance oils are the best for creating dreamy, non-toxic scents; however, when you’re shopping for scents, be sure to select oils that are free of harmful chemicals, like phthalates.
Why We Love It: This set of highly-concentrated fragrance oils are cruelty-free and phthalate-free, so you can enjoy dynamic aromas without possible irritants.
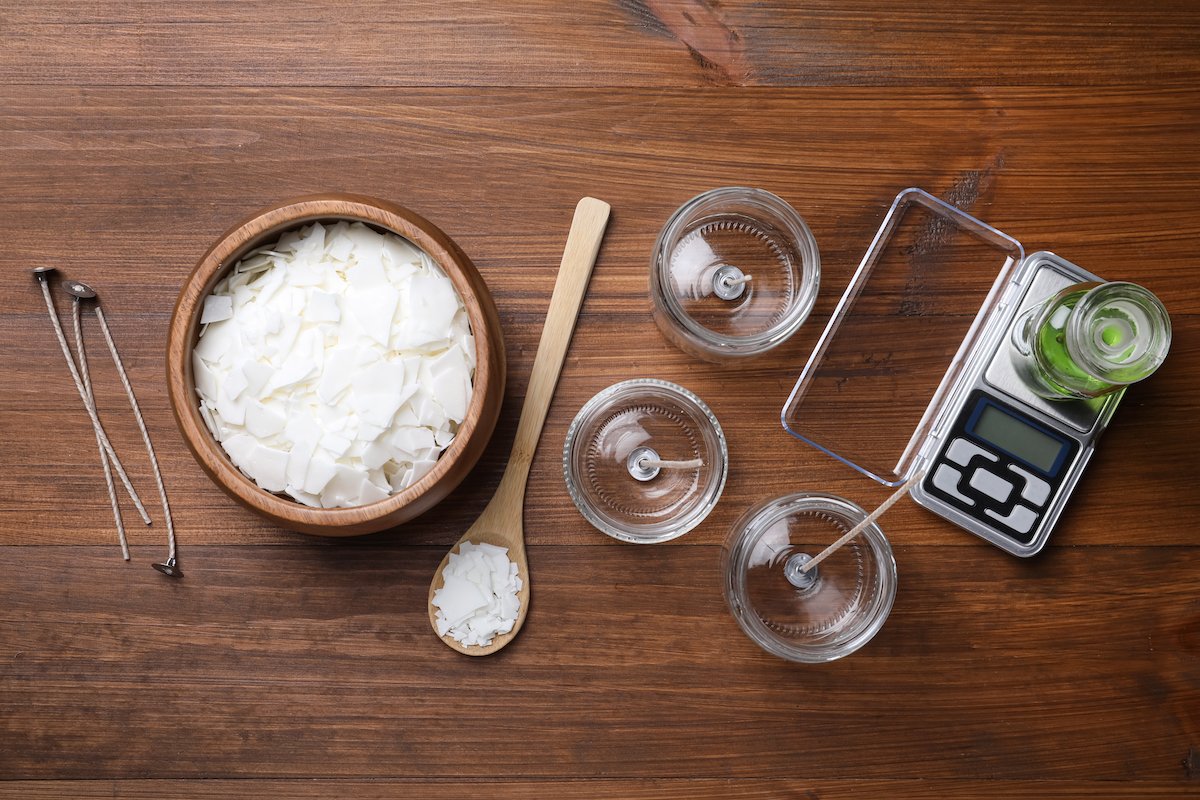
Tools
Many of the tools needed to make your own candles may already be in your kitchen. However, wax loves to stick to everything, so if you don’t want to forfeit your beloved kitchen utensils for candle making, consider investing in tools specifically designated for candles.

Image: Amazon
10-Ounce Glass Jar Set
Price: $$
Choosing the perfect container to house your candle can be the most exciting part. Candle making is the perfect way to upcycle those glass jars you’ve been hoarding, or you can visit local thrift stores to find a hidden gem to house your creation. If you’re looking to make multiple candles to gift or sell, or just prefer a cohesive look, you can opt for a set of glass jars.
Why We Love It: These jars are dishwasher-safe, so you can easily clean them to reuse for your next project!

Image: Amazon
Double Boiler Pot
Price: $
While small amounts of wax can be melted in the microwave, the best way to melt wax is with a double boiler. If you don’t already own one and can’t wait for your next mail delivery, you can easily make your own–all you need is a medium-sized pot with a heat-proof mixing bowl!
Why We Love It: This set comes with a silicone spatula, so you don’t have to sacrifice any of your current baking tools.

Image: Amazon
Waterproof Thermometer
Price: $
Another essential tool you’ll need for candle making, a thermometer will help you to determine the correct temperature of your wax and when it’s time to add in your fragrance oils (typically once it’s reached 185°F). This will help ensure that the oil binds to the wax, creating a stronger aroma when burned.
Why We Love It: This thermometer has a quick response, so you’ll know the wax’s temperature in under four seconds.
How To Make Your Own Candles
After you’ve gathered all of your candle making essentials, it’s time to create your own!
What You’ll Need:
16 ounces of soy wax flakes
1 ounce of fragrance oil
1 wick
1 glass container (approximately 8-10 ounces in size)
Wick sticker or hot glue gun (to secure the wick)
Double boiler or microwave-safe container for melting wax
Thermometer
Stirring utensil
Instructions:
Clean and dry your chosen glass container.
Once dry, attach the wick to the bottom center by using a wick sticker or a small amount of hot glue. To help keep your wick centered, place a chopstick against each side of the wick, resting them across the vessel.
Melt the wax in a double boiler, stirring occasionally. Heat until the wax reaches between 185-190°F.
Remove your wax from the heat and let it cool to 180-185°F.
Once cooled, add in your fragrance oil, gently stirring to evenly distribute it.
Allow the wax to cool further before pouring it into your prepared container, leaving a little space at the top.
Let the candle cool overnight to allow the wax to cure.
Once the candle has completely cooled and solidified, trim the wick to approximately one-quarter inch above the wax surface.
Your homemade candle is now ready to light and enjoy!